Pi-Hole and DNS-over-HTTPS using docker-compose

I'm glad that people started to think about the privacy more than ever

In this post I'll share my experience of configuring pi-hole and Cloudflare DNS-over-HTTPS on Raspberry Pi using docker-compose. Before we dig into the configuration a few words what it's all about

UPD: Post has been updated with newest version of pi-hole

Read more

Asus Zenbook UX303UA memory upgrade

I bought UX303UA Zenbook back in June 2016 for £800. It's meant to be be a temporary laptop to be used for 1-2 years max.

Although it's quite cheap it had very good spec especially for 2016: i7-6500U @ 2.5Ghz and 12Gb RAM with fair 4-6hours on single charge, just 1.2kg. It was a significant improvement from previous Zenbook with i5 and 8Gb memory. RAM is especially critical for java developers, especially for greedy Android tools.

Even now, in 2020 this spec isn't bad at all. It's still possible to get a similar device bus slightly cheaper. Having said that I was thinking to add more memory so I can continue to use laptop comfortabily. Unfortunatelly, all websites and official sources say it's impossible - the max is 8(in the slot)+4(soldered).

Read more

Installing docker-machine on Raspberry PI

One of the nicest things about docker is reproducibility and containerisation. It is possible to run multiple applications which requires different environment on the same computer and make them live happily altogether. Although Raspberry Pi has ARMv7 instructions set, we still can run docker on it - we just need different images. One would be surprised there are some official images available on docker hub.

The configuration can be very simple - literally two commands in terminal, thanks to widely available devops tools such as docker-machine and ansible. Having this setup there won't be need to login to the RPi and perform any manual configuration per service anymore. Instead, services can be configured and deployed right from your computer.

If you don't have your Rasbperry configured yet refer to previous article for the initial setup.

Read more

Setting up Raspberry Pi without Monitor

In this post we will setup and configure Rasbian for your RPi to be instantly available via local network and without screen on the linux or mac system. Those steps should be appliable to any Raspberry PI version

To start with we need a few things:

  • Raspberry PI itself
  • 8Gb+ SD Card, class 10 at least
  • Ethernet cable to connect RPi to the router
  • Downloaded Raspbian Lite zipped image

Read more

RPI Zero scan button

While I was finishing wireless scanner and printer server I realised that traditional document scanning approach is not so nice from UX point of view.

I really like the way office scanners in multi-functional devices work. Normally if you want to scan you just load stack of paper into and put your email address. Scanner does the rest and in minute you'll get ready-to-use pdf file in your inbox.

I was thinking about having button attached to RPI Zero which initiates scanning and document upload.

Read more

RPI Zero: print & scan servers

I had to make old printer and scanner wirelessly available over local network. It can be done using wireless printer USB adapter but it's not that cheap and still doesn't support scanner

Obvious choose is using Raspberry PI with linux installed. Before I heard a lot about RPI Zero but could never believe that it costs just £5. Actually it is just £5 and +£2.5 delivery fee. Surprisingly there are no other options except of first class delivery!

Long story short, I put here main steps how to setup print and scan servers on small Raspberry PI Zero:

General configuration

Upgrade RPI software
To access most recent features and freshly created bugs make sure you use most recent version of RPI firmware. To do so run sudo apt-get dist-upgrade.

Static IP
Assign static IP for your raspberry. The easiest way is configure your router DHCP server. Just bind mac address to nice IP in your network, like 192.168.100.100, later in this post I

Reduce graphic memory fraction
If you aren't going to use video how to

Read more

avr: случайнее random()

В простых встраиваемых устройствах есть большая проблема: очень хочется рандом. Нормальный такой рандом. Но если подумать, то контроллеру совершенно не от чего "рандомизировать" генератор случайных чисел. Ибо каждый старт контроллера "жизнь начинается с 0".

Эта проблема всплыла в пресловутом moodlamp (лампа настроения, переливающиеся цвета светодиода). Хочется чтоб "переливы" каждый раз начинались с нового цвета :)

Read more

КМУ в СПбГУ ИТМО


20-23 апреля 2010 года в Санкт-Петербургском Государственном Научно-Исследовательском Университете Инфорационных Технологий, Механники и Оптики состоялась седьмая ежегодная Конференция Молодых Учёных, приуроченная к 110летию университета.

Была поданна просто уйма заявок(700+ человек), в различные секции, например можно попробовать полистать программу конференции. Секции были не только технические, но и мелькали гуманитарные. В общем на любой вкус и цвет можно было выбирать куда идти.

Read more

Cветодиодная линейка на MAX7219

Попалась мне в руки светодиодная линейка неизвестного происхождения из 52 двухцветных светодиодов - красный и зелёный. Которая управлялась двумя микросхемами maxim max7919(драйвер). У этой платки было 8 пинов для подпайки, один из которых ни к чему не подключался.

Цель - разобраться что она из себя представляет, как работает и сделать что-нибудь с ней - погонять "бегущие огни" будет вполне достаточно.

Read more

CPU load indicator

Что это?

Этот проект может стать хорошим начальным опытом в разработке устройств на микроконтроллере и программировании его, как прошивки мк так и создании управляющей программы.

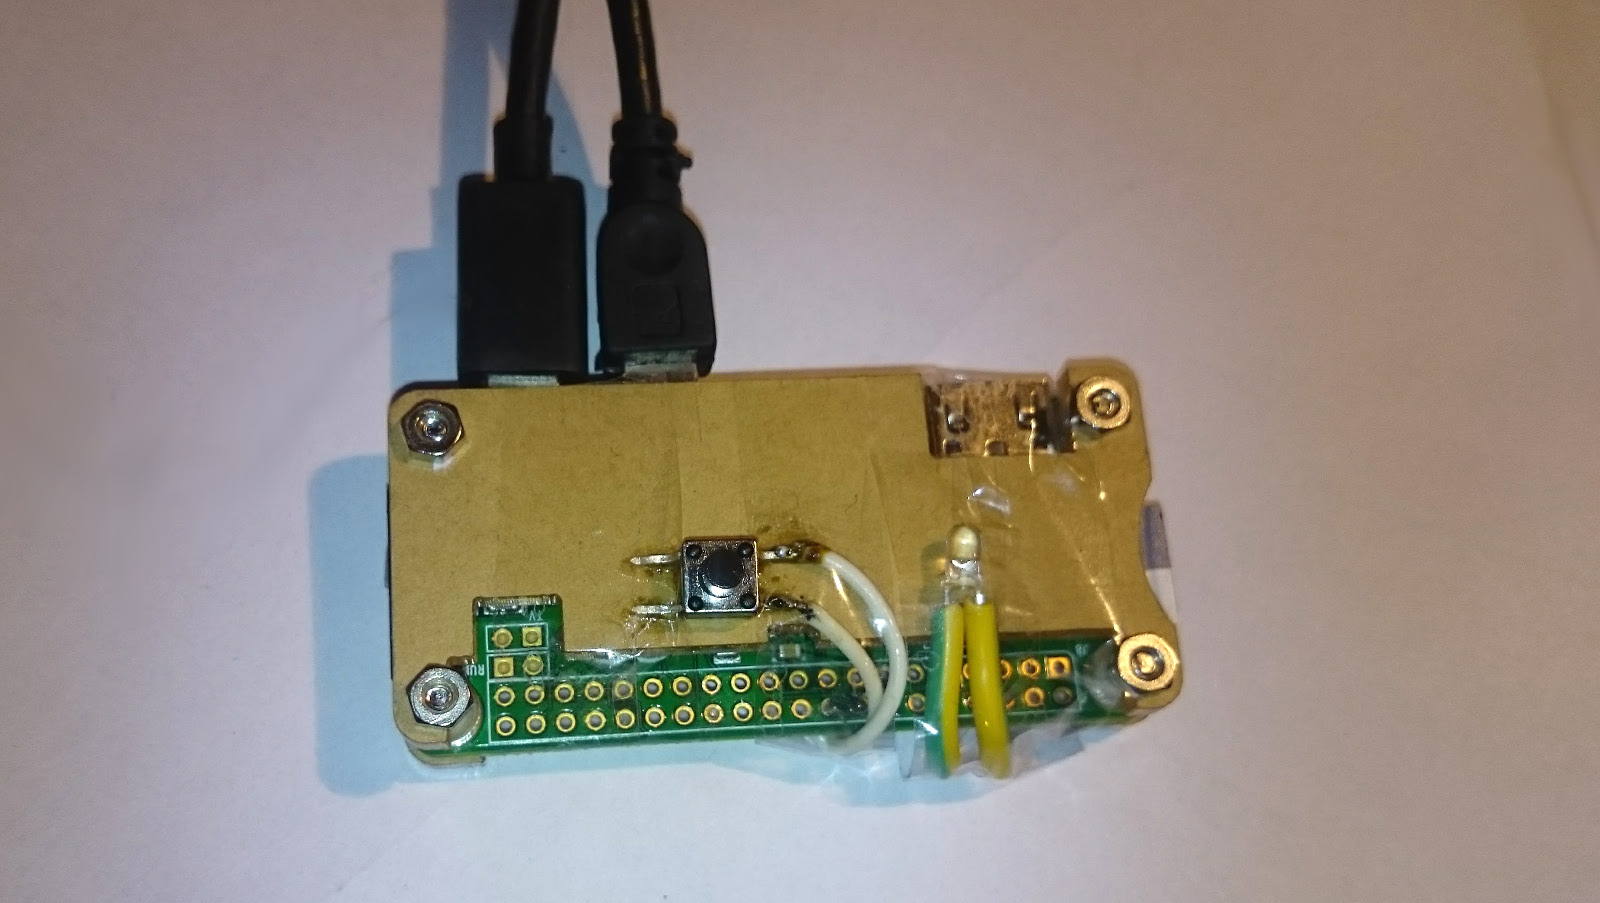
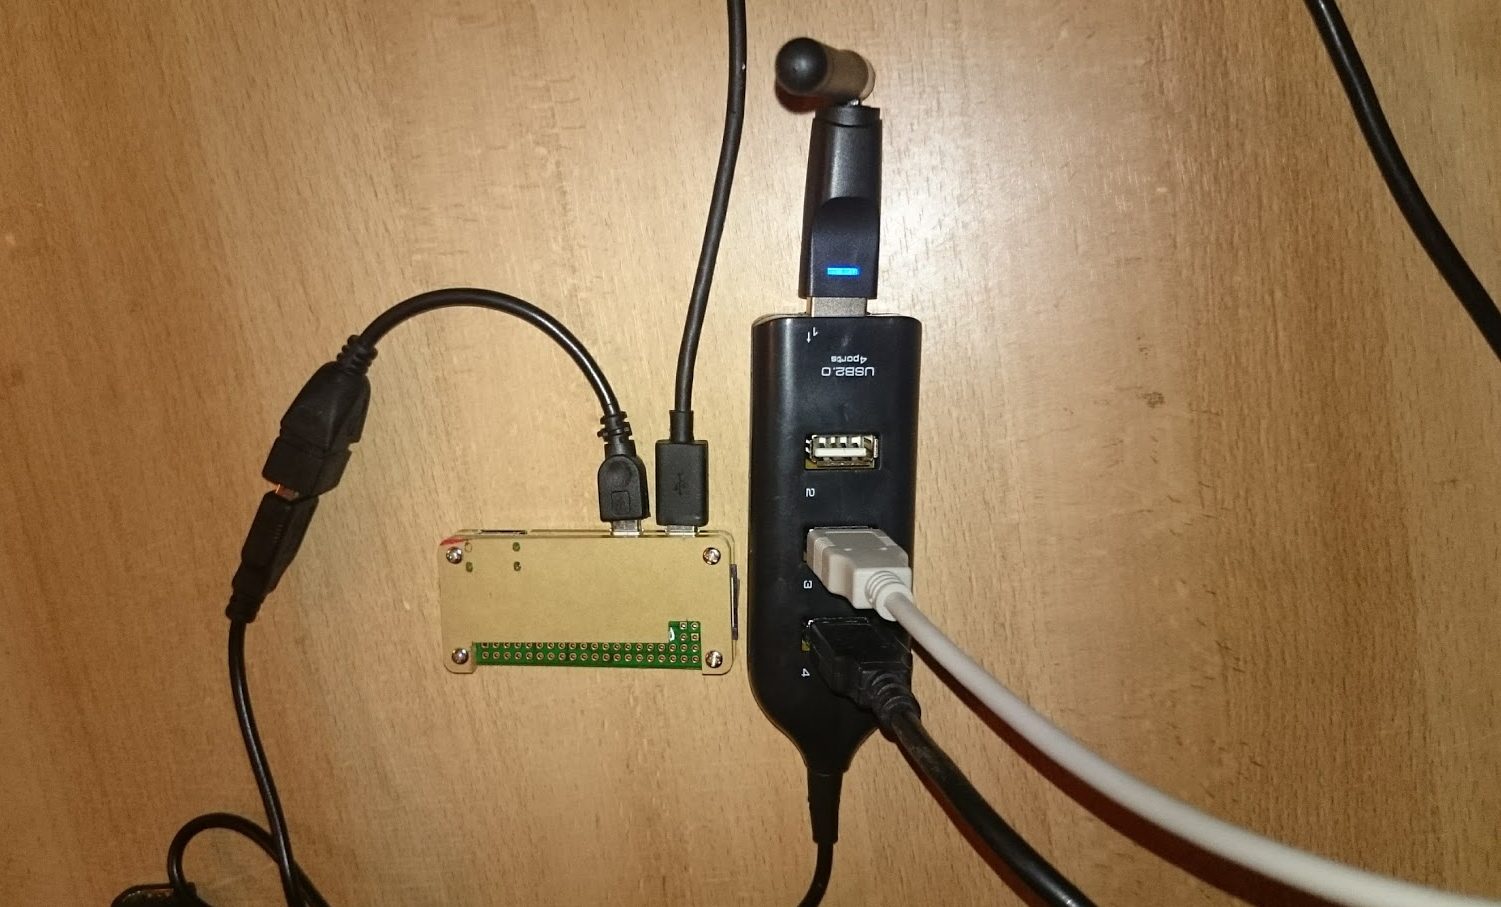
Собственно это очень простое устройство, плавно показывающее текущую нагрузку процессора меняя яркость светодиода(ну или по желанию можно использовать другую нагрузку). Людям, которые занимаются моддингом особо думаю понравится - нужно только приложить фантазию :) Работает через USB, причём программный, реализованный с помощью прооекта V-USB. В качестве мк выбран Atmega8

Read more