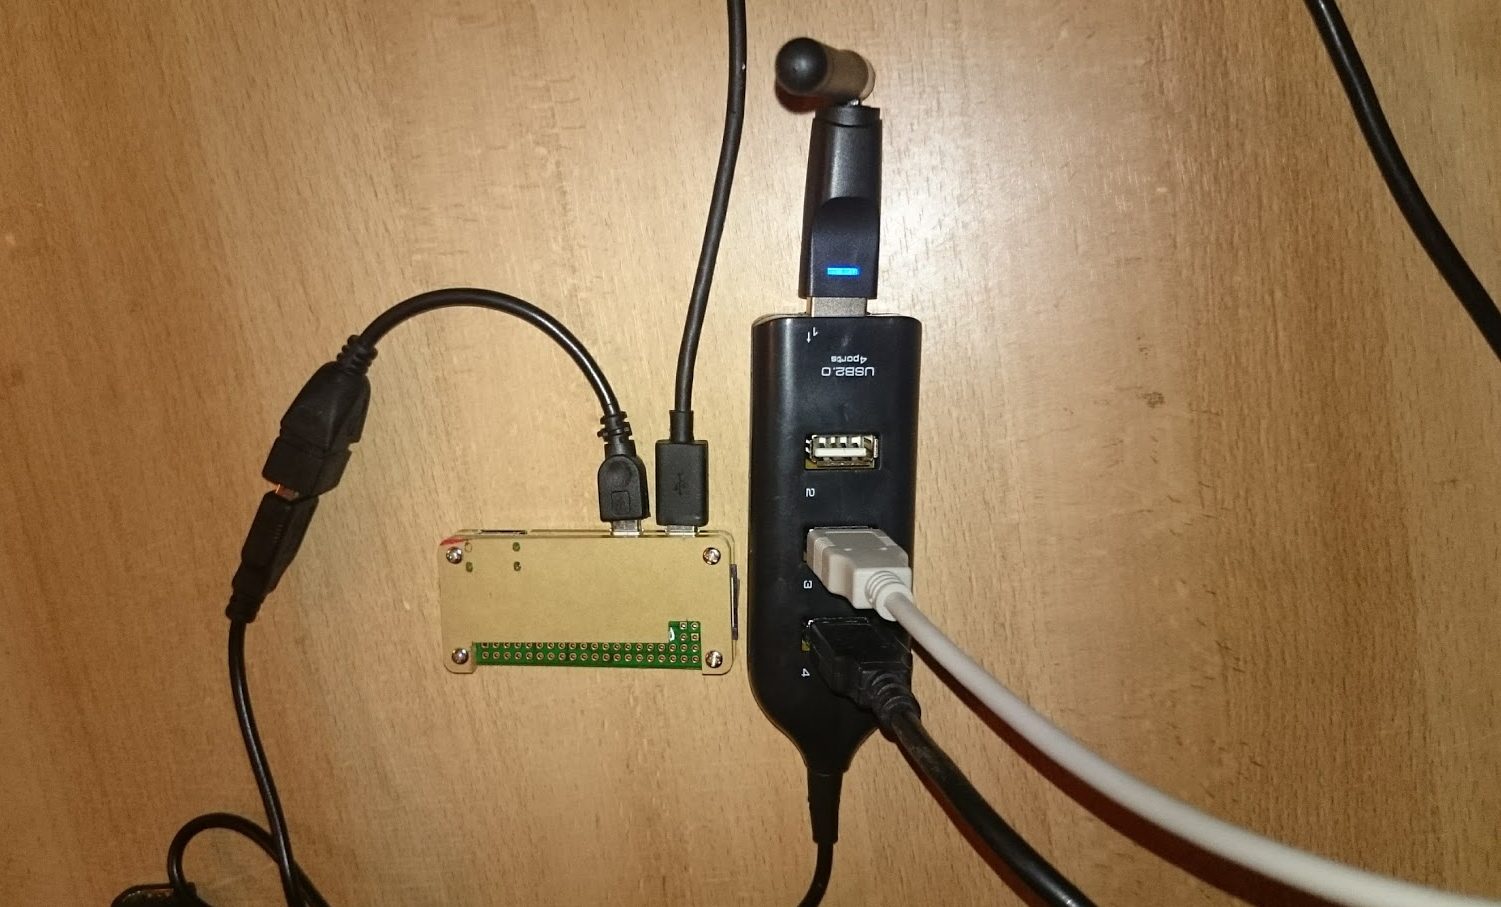
I had to make old printer and scanner wirelessly available over local network. It can be done using wireless printer USB adapter but it's not that cheap and still doesn't support scanner
Obvious choose is using Raspberry PI with linux installed. Before I heard a lot about RPI Zero but could never believe that it costs just £5. Actually it is just £5 and +£2.5 delivery fee. Surprisingly there are no other options except of first class delivery!
Long story short, I put here main steps how to setup print and scan servers on small Raspberry PI Zero:
General configuration
✔ Upgrade RPI software
To access most recent features and freshly created bugs make sure you use most recent version of RPI firmware. To do so run sudo apt-get dist-upgrade.
✔ Static IP
Assign static IP for your raspberry. The easiest way is configure your router DHCP server. Just bind mac address to nice IP in your network, like 192.168.100.100, later in this post I
✔ Reduce graphic memory fraction
If you aren't going to use video how to
Configure cups(print server)
✔ Install cups
sudo apt-get install cups
sudo usermod -a -G lpadmin pi
✔ Configure cups
Make cups listen on all interfaces to make it network available, disable ssl and allow access from network in /etc/cups/cupsd.conf
Port 631
DefaultEncryption Never
DefaultAuthType None

 . . . .

<Location />
  Order allow,deny
  Allow from all
</Location>
<Location /admin>
  Order allow,deny
  Allow from all
</Location>
<Location /admin/conf>
  AuthType Default
  Require user @SYSTEM
  Order deny,allow
  Allow from all
</Location>
✔ Restart print server
service cups restart
✔ Install printer
Point your browser to http://192.168.XXX.XXX:631/ and go to Administraton → Printers → [Add Printer]. You might be asked to put your rpi login password. Most likely your printer will be detected, follow the wizard's prompts to finish setup.
You might want to use openprinting where you can download PPD file for your printer
✔ Configure your Linux/MacOS/Windows to use this printer
Using built in tools add network printer.
Fingers crossed it should work :)
Network scanner
This is more tricky configuration as clients should support network protocol for sane. Unfortunately there are a lot of moving parts and seems like network scan is not the main priority for the sane developers. It takes a while to finish configuration so keep calm :)
✔ Install sane & xinetd
apt-get install sane sane-utils xinetd
✔ Find scanner and driver for it
sane-find-scanner
And hope that you can see connected scanner :) If not google is your friend
At this step you have to make sure that scanimage > someimage is working properly
✔ Configure network daemon systemd files
Create file /etc/systemd/system/saned@.service with content:
[Unit]
Description=Scanner Service
Requires=saned.socket

[Service]
ExecStart=/usr/sbin/saned
User=saned
Group=saned
StandardInput=null
StandardOutput=syslog
StandardError=syslog
And /etc/systemd/system/saned.socket with content:
[Unit]
Description=saned incoming socket

[Socket]
ListenStream=6566
Accept=yes
MaxConnections=1

[Install]
WantedBy=sockets.target
✔ Enable daemon
Open /etc/default/saned and replace RUN=no with RUN=yes
In /etc/sane.d/saned.conf
Put your network, eg 192.168.100.0/24
systemctl enable saned.socket
In theory it should be enough to start using scanner over network.
✔ Configure clients
- On linux you can configure saned by adding RPI IP address to the file /etc/sane.d/net.conf. Running imagescan -L should display remote scanner and xscan should be able use it.
- On windows I found very ugly but working application SaneTwain.
- For macos seems there is only one option Sane Twain Interface
- Full list for sane clients you can find here
✔ Sample output
To make sure you know what to expect here is sample output from the RPI and linux client:
pi@raspberry:~ $ sudo scanimage -L
device `snapscan:libusb:001:004' is a Acer FlatbedScanner23 flatbed scanner

user@client:~ $ scanimage  -L
device `net:192.168.XXX.XXX:snapscan:libusb:001:004' is a Acer FlatbedScanner23 flatbed scanner
Costs
Most of the components you can find on eBay from different vendors:
| RPI Zero | £5 + £2.5 |
| WiFi with antenna on Ralink RT5370 chip | £3.34 |
| micro-USB host adapter | £1.00 |
| 4 ports USB 2.0 hub | £1.5 |
| Sandisk microSD 16Gb class 10 | £7 |
| HDMI type C to HDMI type A adaptor | £1.1 |
| RPI Zero Case | £1.30 | Total | £15.2 |
Wireless computer just for price of two-course meal. Not bad, isn't it?
Conclusion
Of course it's possible to extend this computer even more, for example by connecting to external screen for XBMC. You also can connect camera, setup vpn server, host your website and do a lot of fun and useful stuff!

